WordPress in Dreamweaver CS5 with the IIS 7.5 Platform
April 19, 2011 1 Comment
 WordPress and Adobe® Dreamweaver® CS5 (and CS5.5) can work together in your Internet Information Services (IIS) 7.5 platform. Although WordPress works best in the Apache environment, it does work with the Windows environment too. Dreamweaver can work with WordPress to help developers organize its fragmented PHP structure.
I hadn’t used Dreamweaver in a long time because there are plenty of other html editors out there that did a better job in my opinion. When I heard that Dreamweaver CS5 would support WordPress, Joomla!, and Drupal, it gave me a reason to come back. Not only does it help keep the fragments of the CMS together, but offers code-hinting, which helps developers stay sane.
I found a great tutorial series from Adobe called “Editing a WordPress theme with Dreamweaver CS5” that covers a lot of material, but it only shows the use of the XAMPP and MAMP environments. After some trial-and-error, I got it working on IIS 7.5.
Installing WordPress on your local machine
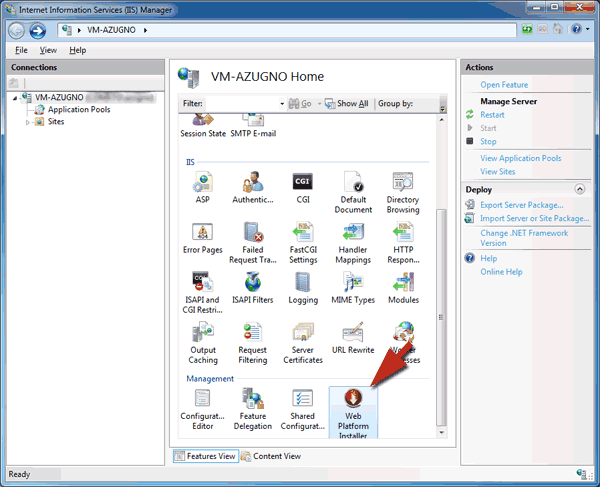
To get WordPress running on your local machine, you need to install PHP and MySQL™. You can install them manually, or use the Web Platform Installer in your IIS Manager to install it for you.
For this example, I installed my local WordPress site at http://localhost:8888. Make sure your local website runs properly before proceeding.
Viewing WordPress in Dreamweaver
Now you need to apply the correct settings to run WordPress in Dreamweaver:
1. Open DreamWeaver, and go to Site -> Manage Sites
2. In the pop-up window, click New…
3. Select the Site sub-menu (on the left), enter a name for your site, and its local path
4. Select the Servers sub-menu (on the left), and click on the + under the table
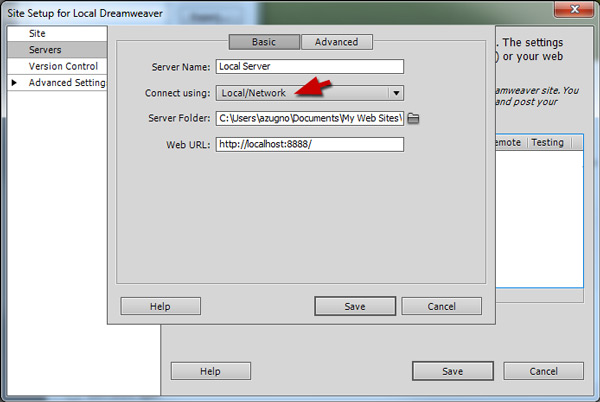
5. In the Basic tab, select Local/Network from the drop-down in the Connect Using: row.
6. In the Advanced tab, under the Server Model: row, select PHP MySQL
7. After the new server row appears, uncheck the Remote checkbox, and check the Testing checkbox
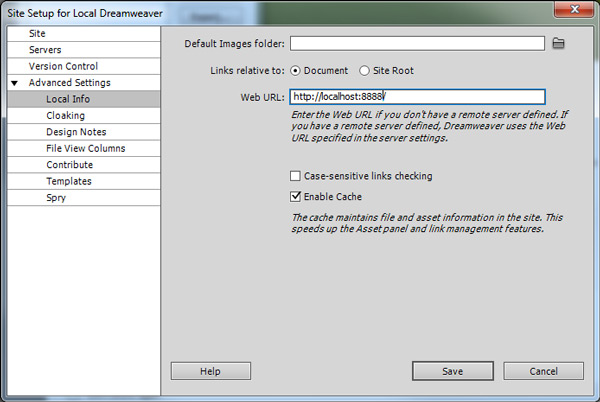
8. Under the Advanced Settings -> Local Info, ensure your local host is correct
9. Click the Save button to save your settings
10. On DreamWeaver’s top menu, go to Site -> Site-Specific Code Hints…
11. Select WordPress for the Structure
DreamWeaver can now recognize your locally stored WordPress. If you select index.php, you can see all the dependencies listed (circled in red). You can also take advantage of the Live View to see the PHP code executed.
If you have completed the setup properly, you can test the code hinting by typing $wp_ inside the php tags. If you don’t see it, try ctrl + space to activate code hinting.
Although this setup is a lot of work, I found it to be very useful in developing WordPress sites. If you have a complicated template, it may take you a long time to find the file responsible for the section you need to change. With DreamWeaver, it’s easy to find the php fragments, and CSS.


Pretty! This has been a really wonderful article.
Many thanks for providiing this information.